Mini Photo Album With 3 POCKETS Tutorial
(This was originally made for my a gal in my first Business Builder Swap unfortunately I don't remember her name. Thanks for a wonderful gift!)
SUPPLIES NEEDED:
• 4 ½ X 12 CS for base
• 3 - 2 ¾ X 8 strips of white CS for inside pockets
• 3 – 2 ¾ X 3 ¾ pieces of B&T and/or CS (2 B&T and either an alternating B&T or CS for 3rd piece) to cover inside pockets
• 2 – 2 x 4 ½ pieces of alternating B&T for front
• Stamps and/or embellishments to put finishing touches to your project.
• Adhesive, cutter, scorer.
INSTRUCTIONS:
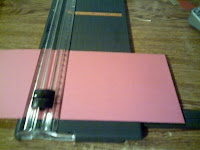
1. Score 4 ½ X 12 CS With CS placed lengthwise on scorer - at 3 inches, 6 ¼ inches, 6 ½ inches, 9 ¾ inches and 10 inches (see Scoring Step 1 picture)

2. Fold at each score line. You will have the longest end at the bottom and the shortest end on the top when you fold your paper. (See Folded Step 1, 2 and 3 pictures)


3. Fold the 3 2 ¾ X 8 strips of CS in half lengthwise. This creates 3 2 ¾ X 4 strips. (see Step 2 Inside Pocket picture)

4. Glue the 3 white 2 ¾ X 4 inch strips in between the score lines alternating their directions. (see Step 3 Inside Pockets & Step 3 Example of Inside Pockets Open pictures)


5. Glue the 3 2 ¾ X 3 ¾ inch pieces of B&T and/or CS to the 3 white folded inside pockets. (see Step 4 Inside Pockets picture)

6. Glue 2 2 X 4 ½ pieces of alternating B&T to front gluing to the bottom and top farthest edges so that when you fold it over there is no gap. (see Mini Photo Album Front picture)

7. Add stamped images and embellishments as desired.
8. You can add a ½ circle Velcro to the inside of the cover if you want to keep it closed or use a photo clip to close the cover.
If you make one I would love to see it! Post a link back .


hey its Lisa
ReplyDeletethis looks good.