This is such a cute Valentines basket. It gave me inspiration to try it! What is everyone trying out for Valentine projects?

Sunday, January 22, 2012


Saturday, January 21, 2012
I won...
Woohoo!! I won on my very first ever blog challenge on Scrapbook Stamp Society Challenge Blog. I have been wanting to try working with water color pencils for a while and this blog gave me just the opportunity. I was very excited to finally get to work with them. I cant wait to work on the next one!
Tuesday, January 10, 2012
"Pretty In Pink" Scrapbook Stamp Society Blog Challenge
WOOHOO!! My first ever blog challenge!!
I decided to start off my 2012 resolution to blog more with a blog challenge at Scrapbook Stamp Society Challenge Blog. The challenge was to create something using one of their images and the focus is, my favorite, the color PINK!!

I chose the Tippy Toes image from Scrapbook Stamp Society. I used water color pencils and then fussy cut the image so that I could pop dot it for extra dimension. I chose this heart shaped lace frame and altered it slightly to remove the center portion so the background paper would show through. I cut it out using my Make The Cut program and my Cricut. I liked the intricate yet simple detail it gave without taking away from the image.
Using my 2 way Zig pen I added Kunzite from (what a weird name for the color pink!) Martha Stewart's glitter set to the bows. I added some of the left over heart pieces and some pink gemstones from The Paper Studio.
I will be adding it to a notebook as a cover. I think it turned out really cute!!
It would be awesome if you would stop on over and vote for me! Thanks for checking out my first creation of the year!!
Becca
I decided to start off my 2012 resolution to blog more with a blog challenge at Scrapbook Stamp Society Challenge Blog. The challenge was to create something using one of their images and the focus is, my favorite, the color PINK!!

I chose the Tippy Toes image from Scrapbook Stamp Society. I used water color pencils and then fussy cut the image so that I could pop dot it for extra dimension. I chose this heart shaped lace frame and altered it slightly to remove the center portion so the background paper would show through. I cut it out using my Make The Cut program and my Cricut. I liked the intricate yet simple detail it gave without taking away from the image.
Using my 2 way Zig pen I added Kunzite from (what a weird name for the color pink!) Martha Stewart's glitter set to the bows. I added some of the left over heart pieces and some pink gemstones from The Paper Studio.
I will be adding it to a notebook as a cover. I think it turned out really cute!!
It would be awesome if you would stop on over and vote for me! Thanks for checking out my first creation of the year!!
Becca
Sunday, January 1, 2012
Happy New Year!!! 2012
I am looking forward to new adventures in 2012!! 2011 was ok but there are a lot of things I would rather do better this year. I dont usually make New Years resolutions as I rarely keep up with them. I am however focusing on things I want to accomplish.
Keeping current with my blog is my first thing I want to focus on. I have seen such wonderful projects on blogs lately. I want to start documenting my crafting fun!
Here are a few of the things I have made since Christmas. They are my first attempt at paper piecing. I will be posting the completed bear sets when I have finished them. Hope you like them.


Keeping current with my blog is my first thing I want to focus on. I have seen such wonderful projects on blogs lately. I want to start documenting my crafting fun!
Here are a few of the things I have made since Christmas. They are my first attempt at paper piecing. I will be posting the completed bear sets when I have finished them. Hope you like them.


Friday, December 23, 2011
Gatefold Card holder for Charms
I have been playing with my Cricut Expression and cutting files. I wanted to share a gate fold card that was graciously offered as a free download at Monica's Creative Room. This was made to hold the Charms made for the Mini Album Scraps swap. I probably will add a little more to the card before I am finished but thought I would share.


You can see the charms here
Charms - MAS Charm Swap
I wanted to share some charms that I made for the January charm swap on Mini Album Scraps Ning site. The theme was shiny and new. I love these pink and clear crystal beads. I had a lot of fun making them. The first picture is the set of charms on a picture holder that I received as a Christmas gift several years ago. It turned out to be the perfect holder for the chain while I assemble the charms!

The next 2 pictures are some of the variances between the charms.


You can see the gatefold card I made to hold this here
Hope you like them! Come visit us at MAS!
Friday, December 16, 2011


The card overlay is 9 1/2 inches by 4 inches patterned paper scored at 4 1/4th, 8 9/16th and 9 1/2 inches. Fold the 4 1/4th inch section up and the 15/16th inch section down over the top. Cut 3 1/2 x 4 inch piece of cardstock. Line up with the 4 1/4th inch fold leaving the 1/16th inch at top open so it folds easily. This should bring the cardstock down to leave 3/4th inch of the patterned paper still showing. Glue the top section down over the cardstock.
Cut 2 1/4 x 4 inch ivory (or light colored) cardstock and center over the cardstock. In this example I stamped the large snowflake and cut it in half for the right side of the slider. I stamped Winter Wonderland in both first and second generation moving the second generation just slightly to the left to give a layered effect. The snowflake that is mounted on foam tape was cut from the Art Philosophy Cricut Cartridge and then stamped with the coordinating stamp from the Snowflake Stamp Set.

Hope you enjoyed my card!! I had a lot of fun making it. If you are interested in any Close To My Heart products please visit my friend Janis Purvis at https://jmpurves.myctmh.com.
Wednesday, December 14, 2011
Ornaments swap for Valerie on MAS

 This is a set of ornaments I made for an Ornament Swap on Mini Album Scraps Ning site. I bought clear glass ornaments and red, green and white ribbon at Walmart (I found them cheaper at other stores later).
 I removed the lid and cut strips of paper 3/4 inch x 6 inch. I used my pokey tool (I know not the real name but thats what I have always called it lol) to roll the paper tight. I found that it is easier to have something ready to lay on top of these as you roll them. It makes it easier to get the look you want if they are all still tightly rolled when you add them to the ornament ball. Otherwise you get different sizes when they unroll. Works both ways, I just liked it packed more.
 Once I had several strips rolled (I think I used 10-12 rolls per ball) I placed them inside the ball quickly so that they didnt unroll too quickly. Once I had it as full as I liked I shook it gently to get them to unroll a little.
I used Glossy Accents to glue the top back on. Tip.. dont do this with too much or it will run inside your ornament! lol. Tie ribbon through the ring on the top then curl with scissors.
Your done! These are very fun and easy to make. Great for a family project.
Hope you enjoy them!
Friday, December 9, 2011
No time like the present!
I have recently realized there is no time like the present to slow down and enjoy the little things in life. Having had multiple dr visits, a Cat Scan and emergency surgery in the past 7 days I have realized that life is too precious to just go through it warp speed with my eyes shut.
I am very thankful for the 2-4 weeks the doctor is having me take off to recover. It will allow me to regroup and get back to the basics again. I have so many craft projects that I want to try. I definitely have enough to keep me preoccupied and hopefully not bored. Playing with my new Cricut Expressions has been so much fun!
Hope to be back soon to post some new projects.
Becca
I am very thankful for the 2-4 weeks the doctor is having me take off to recover. It will allow me to regroup and get back to the basics again. I have so many craft projects that I want to try. I definitely have enough to keep me preoccupied and hopefully not bored. Playing with my new Cricut Expressions has been so much fun!
Hope to be back soon to post some new projects.
Becca
Monday, September 5, 2011
Vegging time....
I love holidays.. They usually mean an extra day off work.. this time I took two. Just vegged around the house all weekend. Love that I still have 2 days off. Love that Damon is off work with me. That is a rare thing to get 2 days together.
I have joined a ning group that I just love. MAS is an awesome place with lots of wonderful people and friendships made very easily. I love that there is always someone to talk to and depending on the time always someone new to talk to. There are people from all over the world which is cool too. Joining MAS has rejuvenated my creativity. I am having an awesome time creating new things.
I want to start recording youtube videos it seems like alot of fun.
Well.. its 1am .. gonna go have pizza and maybe create something new. Probably will get lost in scrapbooking videos lol.
I have joined a ning group that I just love. MAS is an awesome place with lots of wonderful people and friendships made very easily. I love that there is always someone to talk to and depending on the time always someone new to talk to. There are people from all over the world which is cool too. Joining MAS has rejuvenated my creativity. I am having an awesome time creating new things.
I want to start recording youtube videos it seems like alot of fun.
Well.. its 1am .. gonna go have pizza and maybe create something new. Probably will get lost in scrapbooking videos lol.
Sunday, August 28, 2011
Updating my blog profile... what fun!
I have spent most of the evening re-designing my blog. I had so much fun going through templates and backgrounds. I finally chose the denim design I currently have. I thought it was really cute. I loved the banner too!
I didnt realize just how outdated my blog was until I started looking at the "gadgets" lol. I viewed one of the blogs I am following that I like alot ("Just A Few Designs") to get ideas of what I was missing. After several design changes I am finally (I think lol) happy with the way my blog looks.
Hope you enjoy it!
Becca
I didnt realize just how outdated my blog was until I started looking at the "gadgets" lol. I viewed one of the blogs I am following that I like alot ("Just A Few Designs") to get ideas of what I was missing. After several design changes I am finally (I think lol) happy with the way my blog looks.
Hope you enjoy it!
Becca
Sunday, July 31, 2011
Rejuvinating my creative juices
Its been a while since I was here. Ok, its been 3 years lol. I had taken a break from constant scrapbooking and am excited to get back in the saddle so to speak.
I just joined a couple new yahoo groups and it is exciting to see the activity they have going on. I am looking forward to making new friends and getting creative again.
Seeing the pictures on one of the gals blogs today made me want to start posting pictures again. I love nature, my animals and anything colorful.
I just joined a couple new yahoo groups and it is exciting to see the activity they have going on. I am looking forward to making new friends and getting creative again.
Seeing the pictures on one of the gals blogs today made me want to start posting pictures again. I love nature, my animals and anything colorful.
Saturday, August 2, 2008
SATURDAY, AUGUST 2ND 2008
Mini Photo Album With 3 POCKETS Tutorial
(This was originally made for my a gal in my first Business Builder Swap unfortunately I don't remember her name. Thanks for a wonderful gift!)
SUPPLIES NEEDED:
• 4 ½ X 12 CS for base
• 3 - 2 ¾ X 8 strips of white CS for inside pockets
• 3 – 2 ¾ X 3 ¾ pieces of B&T and/or CS (2 B&T and either an alternating B&T or CS for 3rd piece) to cover inside pockets
• 2 – 2 x 4 ½ pieces of alternating B&T for front
• Stamps and/or embellishments to put finishing touches to your project.
• Adhesive, cutter, scorer.
INSTRUCTIONS:
1. Score 4 ½ X 12 CS With CS placed lengthwise on scorer - at 3 inches, 6 ¼ inches, 6 ½ inches, 9 ¾ inches and 10 inches (see Scoring Step 1 picture)
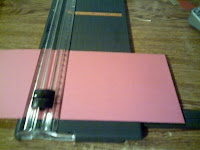
2. Fold at each score line. You will have the longest end at the bottom and the shortest end on the top when you fold your paper. (See Folded Step 1, 2 and 3 pictures)


3. Fold the 3 2 ¾ X 8 strips of CS in half lengthwise. This creates 3 2 ¾ X 4 strips. (see Step 2 Inside Pocket picture)

4. Glue the 3 white 2 ¾ X 4 inch strips in between the score lines alternating their directions. (see Step 3 Inside Pockets & Step 3 Example of Inside Pockets Open pictures)


5. Glue the 3 2 ¾ X 3 ¾ inch pieces of B&T and/or CS to the 3 white folded inside pockets. (see Step 4 Inside Pockets picture)

6. Glue 2 2 X 4 ½ pieces of alternating B&T to front gluing to the bottom and top farthest edges so that when you fold it over there is no gap. (see Mini Photo Album Front picture)

7. Add stamped images and embellishments as desired.
8. You can add a ½ circle Velcro to the inside of the cover if you want to keep it closed or use a photo clip to close the cover.
If you make one I would love to see it! Post a link back .
Mini Photo Album With 3 POCKETS Tutorial
(This was originally made for my a gal in my first Business Builder Swap unfortunately I don't remember her name. Thanks for a wonderful gift!)
SUPPLIES NEEDED:
• 4 ½ X 12 CS for base
• 3 - 2 ¾ X 8 strips of white CS for inside pockets
• 3 – 2 ¾ X 3 ¾ pieces of B&T and/or CS (2 B&T and either an alternating B&T or CS for 3rd piece) to cover inside pockets
• 2 – 2 x 4 ½ pieces of alternating B&T for front
• Stamps and/or embellishments to put finishing touches to your project.
• Adhesive, cutter, scorer.
INSTRUCTIONS:
1. Score 4 ½ X 12 CS With CS placed lengthwise on scorer - at 3 inches, 6 ¼ inches, 6 ½ inches, 9 ¾ inches and 10 inches (see Scoring Step 1 picture)

2. Fold at each score line. You will have the longest end at the bottom and the shortest end on the top when you fold your paper. (See Folded Step 1, 2 and 3 pictures)


3. Fold the 3 2 ¾ X 8 strips of CS in half lengthwise. This creates 3 2 ¾ X 4 strips. (see Step 2 Inside Pocket picture)

4. Glue the 3 white 2 ¾ X 4 inch strips in between the score lines alternating their directions. (see Step 3 Inside Pockets & Step 3 Example of Inside Pockets Open pictures)


5. Glue the 3 2 ¾ X 3 ¾ inch pieces of B&T and/or CS to the 3 white folded inside pockets. (see Step 4 Inside Pockets picture)

6. Glue 2 2 X 4 ½ pieces of alternating B&T to front gluing to the bottom and top farthest edges so that when you fold it over there is no gap. (see Mini Photo Album Front picture)

7. Add stamped images and embellishments as desired.
8. You can add a ½ circle Velcro to the inside of the cover if you want to keep it closed or use a photo clip to close the cover.
If you make one I would love to see it! Post a link back .
MY FIRST BLOG!!!
This is my first attempt to do a Blog. I am so excited! I cant wait to start posting things. Come back soon.
Subscribe to:
Posts (Atom)
